Pilot grant – Basic Information
Pilot grant is used to test the User's need regarding the use of PLGrid Infrastructure.
- Allows instant access to the resources.
- Allows for use of 1000 CPU units and 10 GB of disk storage space in selected PLGrid centers
- Maximum time for a single task is 72 hours
- The resources of this grant can be used up to one year.
- You cannot have more than one active Pilot grant at the same time.
- Pilot grant is subject of renegotiation.
- Pilot grant is subject of Settlement.
- Publications produced as a result of its use should be reported using the Settlement tab.
- The grant description, "Research purpose", "Computational readiness" and "Declared publications" should be consistent with the intended research.
Applying for PLGrid Pilot grant
The grant application process should be started in the Grants space in the Portal.
Click New Grant in the left menu, then the PLGrid Pilot Grant tile. Use the green Apply button located below.

In the next step, it is necessary to specify in which Center the Pilot grant is to be activated. You need to select the specific Center and then use the Next button.
In the next step, enter the basic parameters of the new grant:
- Title (a concise, usually one-sentence, description of the subject of the research, containing specific features of the researched phenomenon)
- Unique identifier (ID)
- Team ID, selected from a list of existing
- Applicant's affiliation
and then use the Save and Continue button to move to the next parameters selection view.

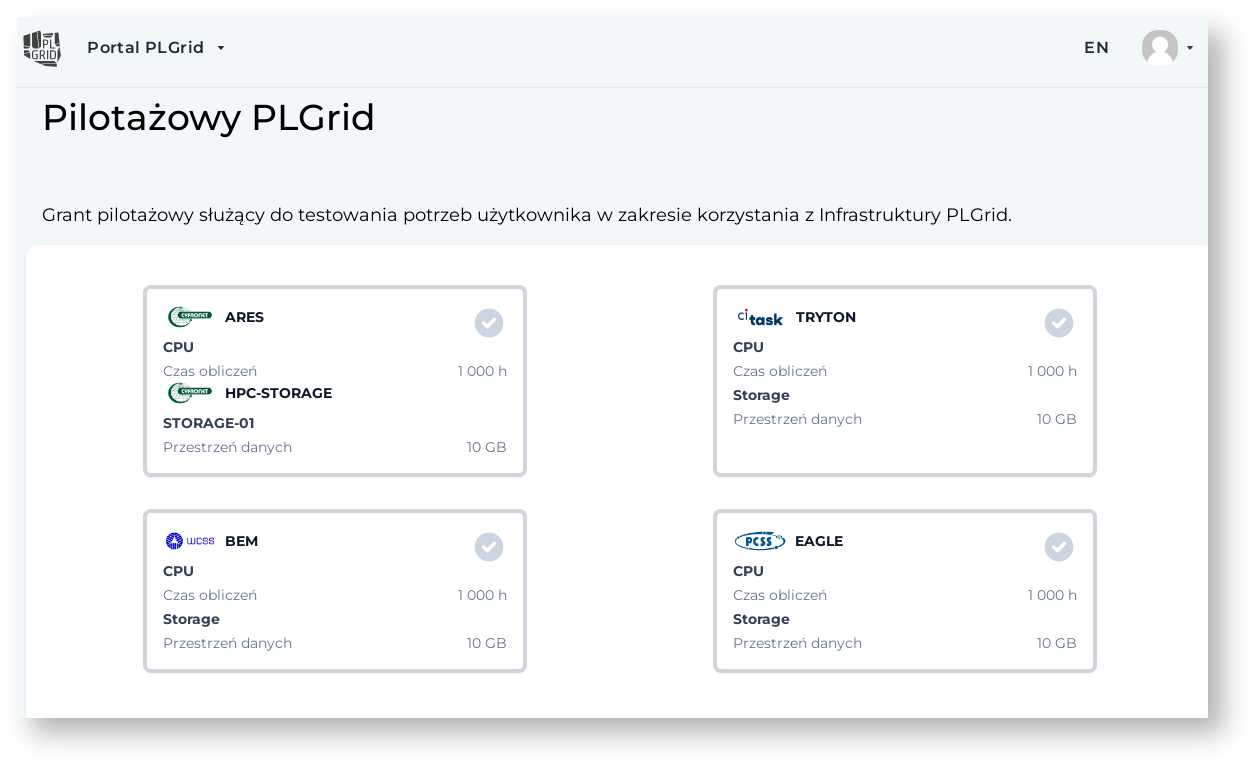
An exemplary view of the Pilot Grant assumed for the ARES cluster.
After clicking Save and Continue, the resource selection view for the requested grant is displayed.
- CPU: computation time (editable)
- CPU: task execution time (editable)
- GPU: GPU cards computation time (editable)
- STORAGE (data space to be used)
In this step, select (using the buttons with a "+" symbol) the resources You are planning to use. Complete the appropriate fields and Create Allocation.
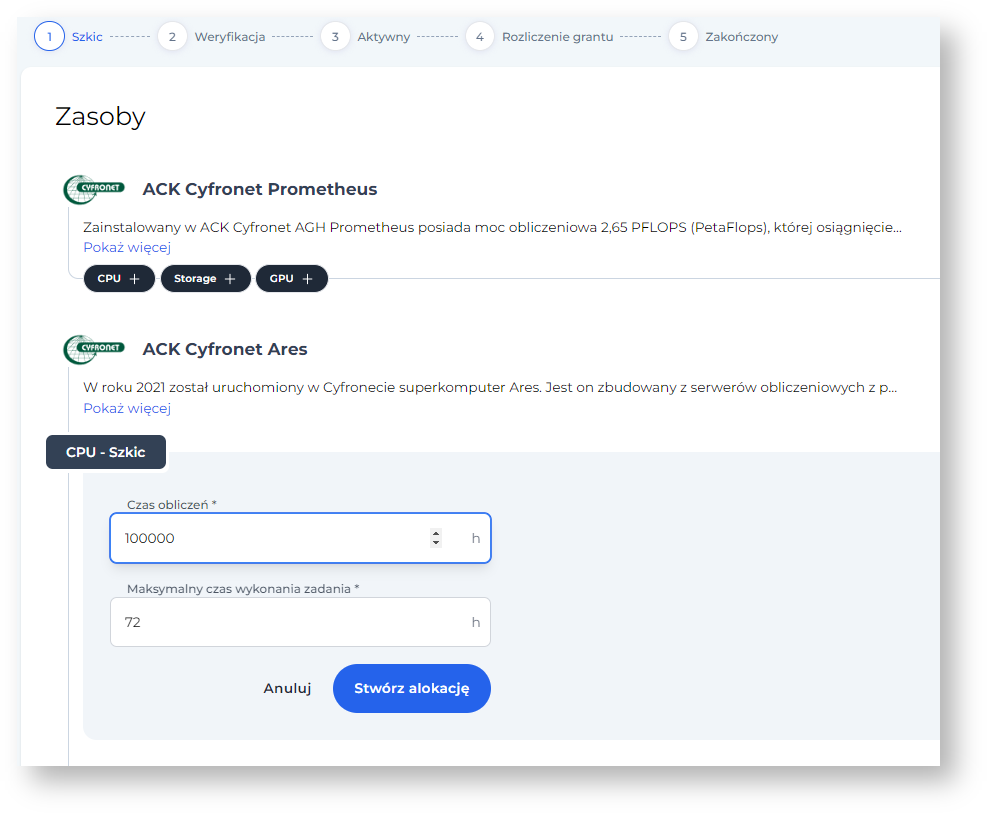
Resource view for the Pilot grant
After creating an allocation go Next and fill out the Grant Details.
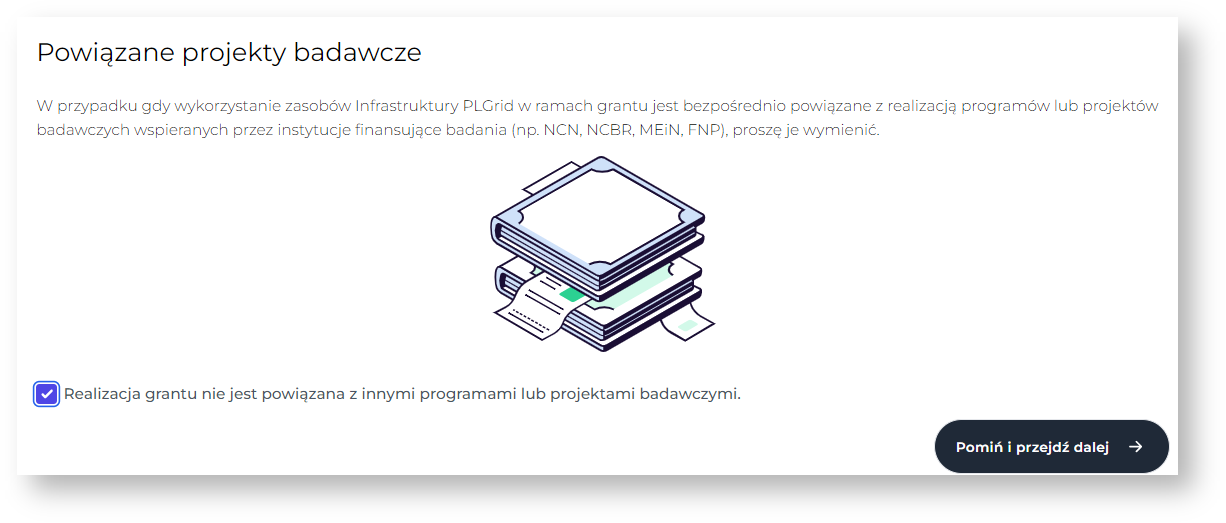
In the next step You can add related research projects. If the grant project is not related to them, select the checkbox and Proceed further.
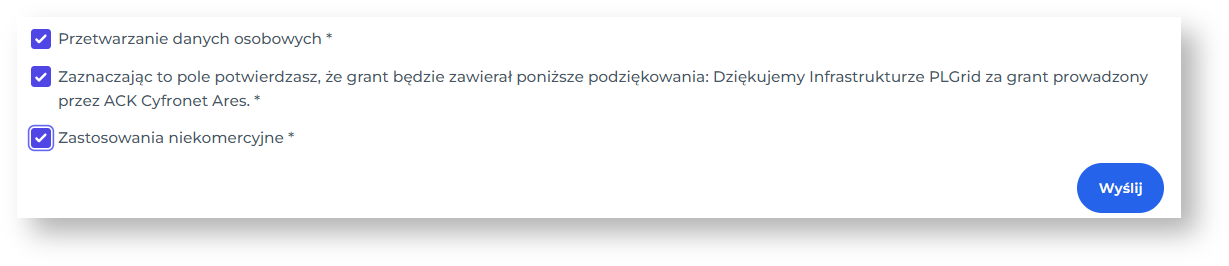
Now specify the Publication Declarations that ( as You predict) will be written with the use of PLGrid Infrastructure.

If the application is correctly completed, the left menu will show a check mark by each section.
In the last step: Grant Summary check the required fields and Sent the grant application.
Once sent, the application will be passed to the Operator, who will check its correctness and forward it to the Administrator for further processing.
After the application is verified and resources are allocated, the Grant Status will change to Active.
Overview
Content Tools