Page History
There are several actions that User may perform into his/hers personal workspace. This chapter presents only the available choices, the detailed description of the actions is presented in the corresponding chapters of the Quick Start Guide.
The upper part of the workspace screen is the same with all the other pages in IS-EPOS web platform (Fields 1, 2 and 3, Figure 1). Portal's pages ('Document Repository', 'AH Episodes', etc.) are shown in Field 1 of Figure 1, whereas field 2 depicts the Profile and affiliations, together with the logout button. The workspace can be accessed from any page, by clicking on the 'My workspace' tab (right side of Field 3, Figure 1). The current working directory can change by clicking at any other directory available in the workspace tree (Field 4, Figure 1). Field 4 includes applications and data that have been already uploaded to the workspace by the User (see "AH Episodes", "Applications" and "Data Dandling Applications" chapters). The Actions that User may perform can be accessed either by choosing the 'Actions' button (field 5, Figure 1), or by clicking on the 3 dots on the right margin of Field 4 (indicated by the purple box), just next to each directory, application or data set. The available actions differ from item to item and are summarised below with a brief description:

Figure 1. Description of Workspace layout and functionalities
- Actions for Folders-Applications:
- Make directory - The User can create a new directory.
Anchor fileInformationMenu fileInformationMenu Show File Information - File information (type of object, Format, Source, Size) etc. are displayed on the screen.- Delete - The User may delete the item. Confirmation is requested before permanent deletion.
- Rename - The User may specify a new file name.
- Copy - The item can be moved to a different location/directory of the workspace (and keep existing in the current location).
- Upload - Files can be uploaded to the workspace by this option.
- Create file - The User may create a file by specifying File name, Data type and File format as requested by the system.
- Share: The file can be shared with other registered user(s) to create and work on common projects
-
Actions for Datasets: The Available actions for datasets (e.g. seismic catalogs, velocity models etc) are shown in field 5, Figure 1:Anchor datasetActions datasetActions
- Use in Application - A variety of Applications are offered with respect to the selected data set.
- Use in Visualization - A variety of Visualization Applications are offered with respect to the selected data set.
- Show File Information - File information (type of object, Format, Source, Size) etc are displayed on the screen.
- Download - The data can be downloaded to the User's device.
- Share: The file can be shared with other registered user(s) to create and work on common projects
- Copy - The item can be moved to a different location/ directory of the workspace (and keep existing in the current location).
- Delete - The User may delete the item. Confirmation is requested before permanent deletion.
- Move - The item can be moved to a different location/ directory of the workspace (and be deleted from the current location).
- Rename - The User may specify a new file name.
- Create Link - Make a link of the object in another directory
LINKING
A new mechanism of linking process was introduced to the IS-EPOS platform. It allows creating links to the data directly to the Data Center and within the User’s Workspace. Previously, user copied the data to the personal workspace and processed it. Now, data can be also linked to user’s workspace and it updates simultaneously with the data on the Platform. Additionally, results of calculations performed on linked data are being updated as well.
Example: Creating Link to the catalog
Choose Episode and seismic Catalog on the IS-EPOS platform (Figure 2):
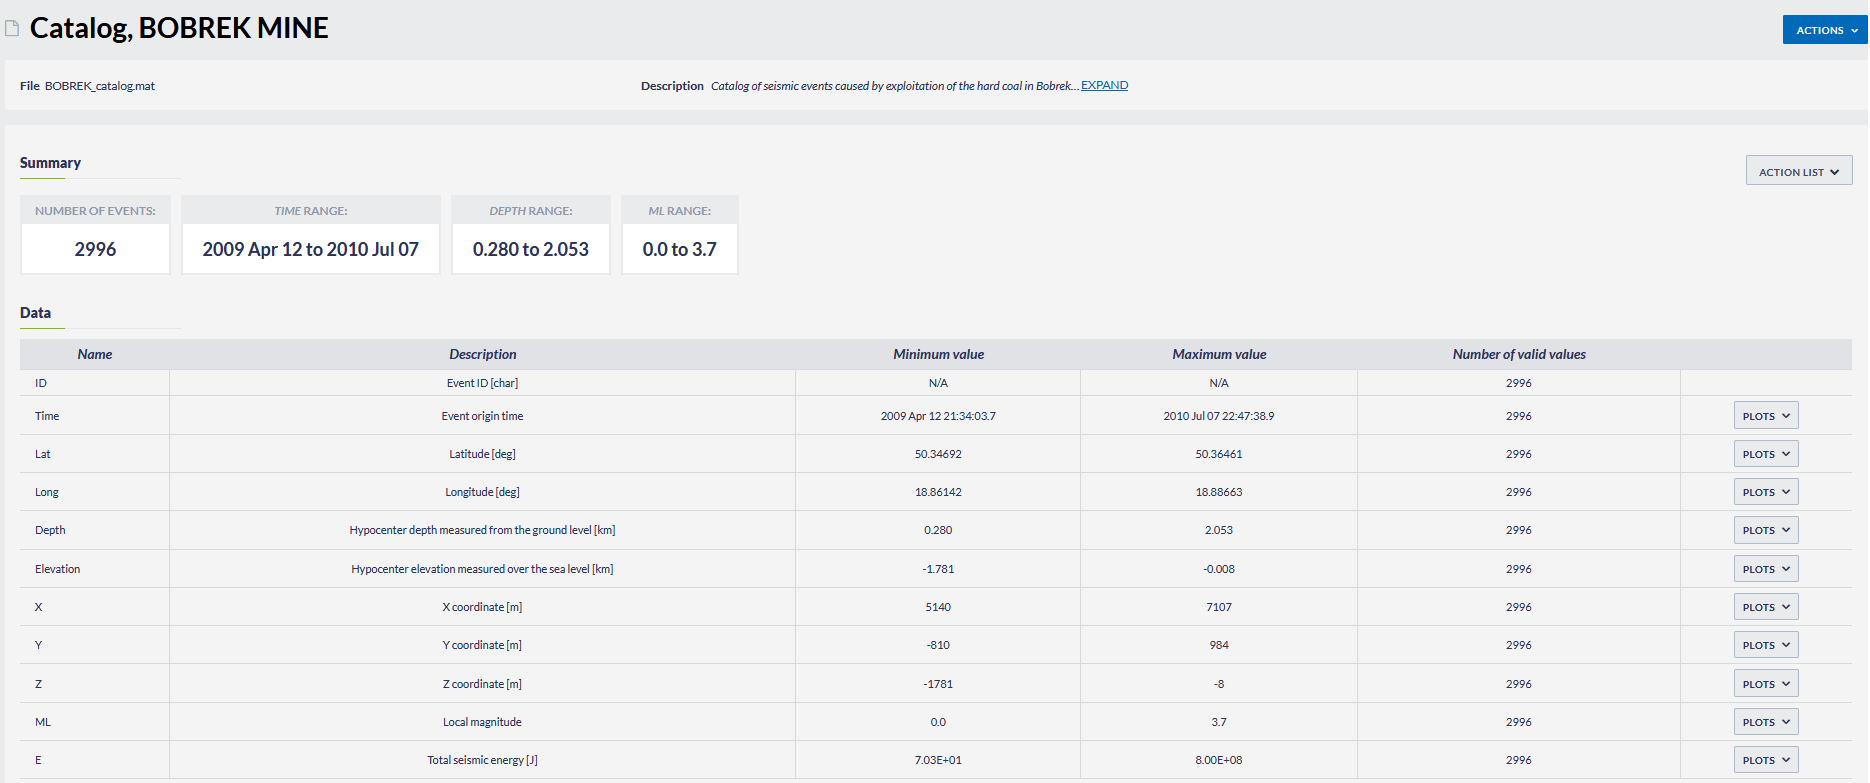
Figure 2. IS-EPOS platform window after selecting Catalog.
Then, select 'Action' button and the 'ADD TO WORKSPACE AS LINK' shown in Figure 3.
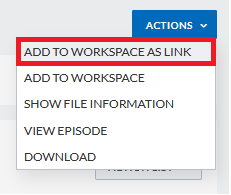
Figure 3. Options available through 'ACTIONS' menu located next to Catalog name.
After any 'ADD TO WORKSPACE' (either copy or link) is chosen, the User is requested to choose a destination where link to the catalog will be created (red panel in Figure 4). The User may select a name for the file in the workspace (blue panel, Figure 4) and submit the decision by clicking OK (green panel, Figure 4).
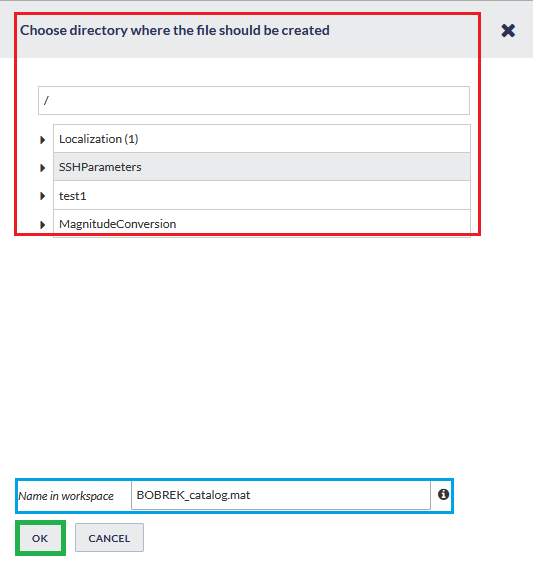
Figure 4. Window with selection of destination directory within User’s Workspace.
After accepting the selection, the link will be created in appropriate directory. User is now able to conduct scientific research on a file linked to the his personal Workspace, which can be opened by selecting the button: 'My Workspace', situated in upper right corner of the IS-EPOS platform.
DATA UPLOAD
A novel functionality was introduced to the IS-EPOS Platform - Data upload to the user’s workspace. Now users can process their own data using all tools within the Platform.
Example: Uploading user’s catalog to the IS-EPOS platform
Firstly, click the 'My Workspace' button. Then, select desired directory within the workspace and pick the Options menu (3 squares next to name of the directory) (Figure 5).
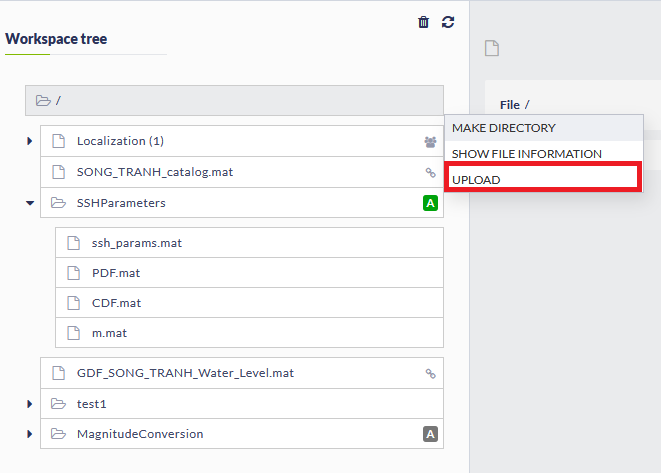
Figure 5. My workspace with 'Upload' option.
After choosing the 'Upload' option, new window appears (Figure 6):
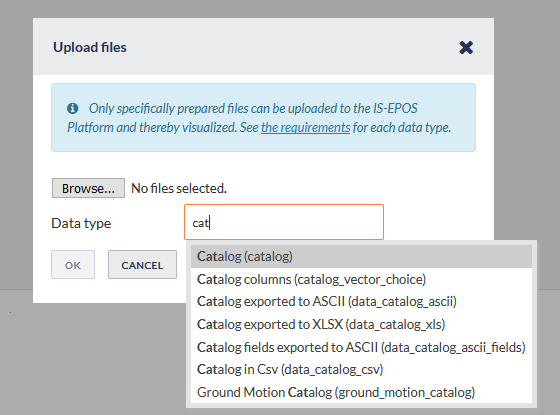
Figure 6. Upload file parameters
The User must choose the file he/she wants to upload, select proper data type and file format. The data type of the file to be uploaded should be first specified. Afterwards, User may select the file and click 'OK' button to upload.
Uploaded file appears in selected directory in User’s Workspace.
SHARING
The data stored in the user’s workspace can be shared with other users of the platform, either in an editable or read-only mode. Similarly, application settings and processing workflows can be shared in order to form working groups and to share projects, data and data products with other users.
Example: Sharing in the IS-EPOS platform
First, the User shall click the 'My Workspace' button. Then, select a directory (data, application or results) within the workspace and pick the Options menu (3 squares next to name of the directory) (Figure 7).
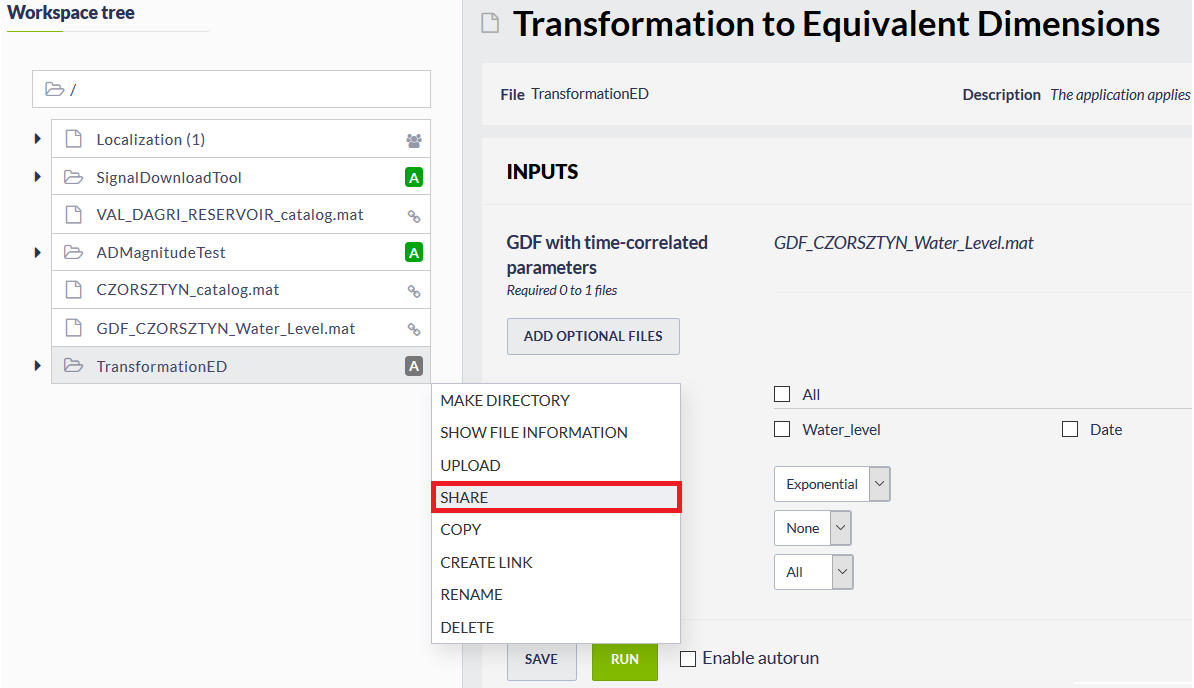
Figure 7. My workspace with 'SHARE' option.
After choosing the 'SHARE' option, new window appears (Figure 8):
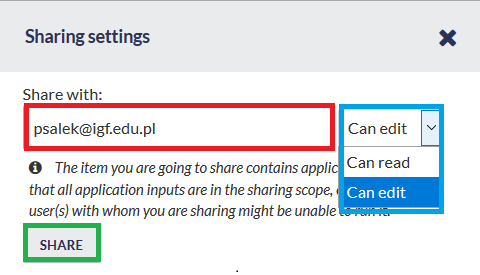
Figure 8. My workspace with 'SHARE' option.
The User now shall enter the email address of the persons with whom he/she wishes to share the selected directory/data/item (red box in Figure 8). An option is available to select whether the shared item can be read-only or editable by the other users (blue box in Figure 8). Finally, the User clicks on “SHARE” tab to share the item with the selected users (green box in Figure 8). The selected users will soon receive an e-mail with a link to the shared item, which they can add to their personal Workspace.
Overview
Content Tools