Contents of this guide
With this guide you will learn about the additional features that are available when you run your custom application, compared with running a built-in application provided by the EPISODES Platform. Otherwise, running a custom application is no different from running other applications, therefore, if you are not familiar with working with the applications yet, please check Applications Quick Start Guide first.
 Finding your custom application on the applications list
All the applications that are not provided as built-in by the EPISODES Platform, are marked with an additional badge Private Application (see Figure 1), therefore, you would be able to easily discern your own applications on the list. As with other applications, you can use search filters to reduce the length of the list (see also this guide), especially, the filter specifying the source of the application (marked in Figure 1) - to see only your applications, select the My Applications option. Note, that your private applications will only be visible to you after you log in to the Platform.
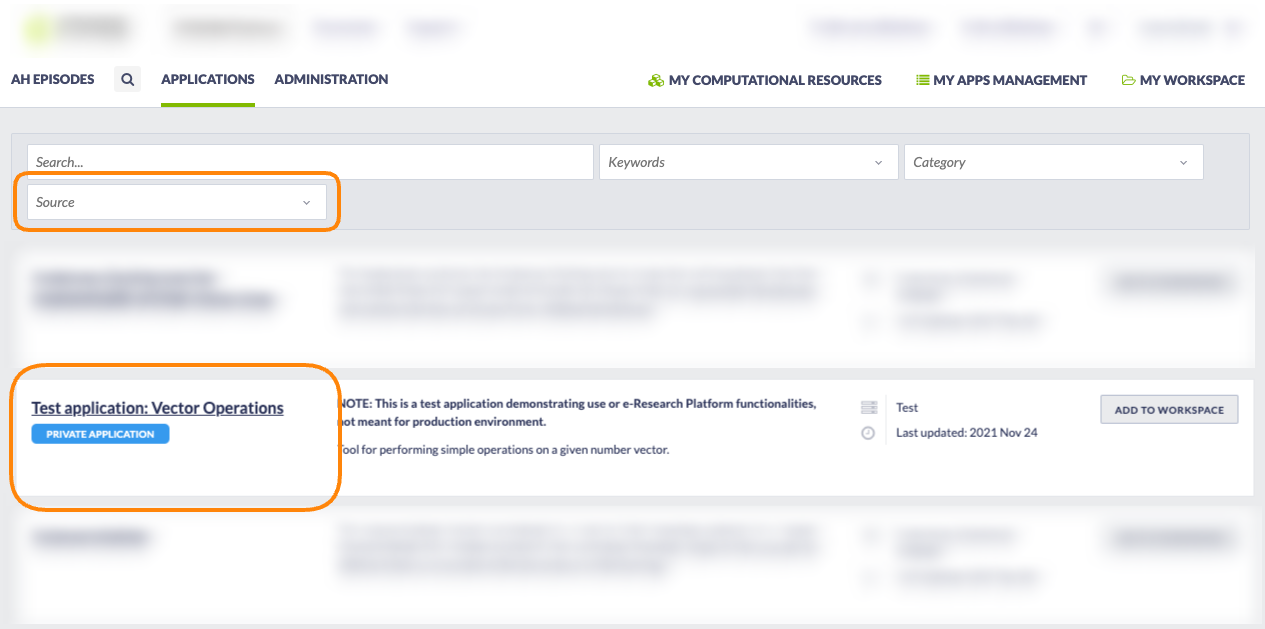
Figure 1. Applications list with custom application and filter marked
Custom application in workspace
One of the things that differentiates your custom application from the built-in applications of the EPISODES Platform, is that you are able to change it at any time. This also means that the changes might be done after you added the application to your workspace. The workspace remembers the exact version of the application from the moment when it was added. This has the following implications:
- Your changes are not automatically loaded after you edit your application files. However, you are informed that the application in the workspace is not up to date with the latest changes you made (with the latest version of the application as seen in the Application Workbench) - see Figure 3, and you can reload it by using the Reload from repository button (marked in Figure 3). Note, that, in case of changes to the application inputs files and/or parameters, when reloading, the values you already entered might be removed (if they do not match the types used in the current version).
- Until you choose to Reload from repository, you can still use (run) the old version of your application, and, e.g. compare its results with the newest version.
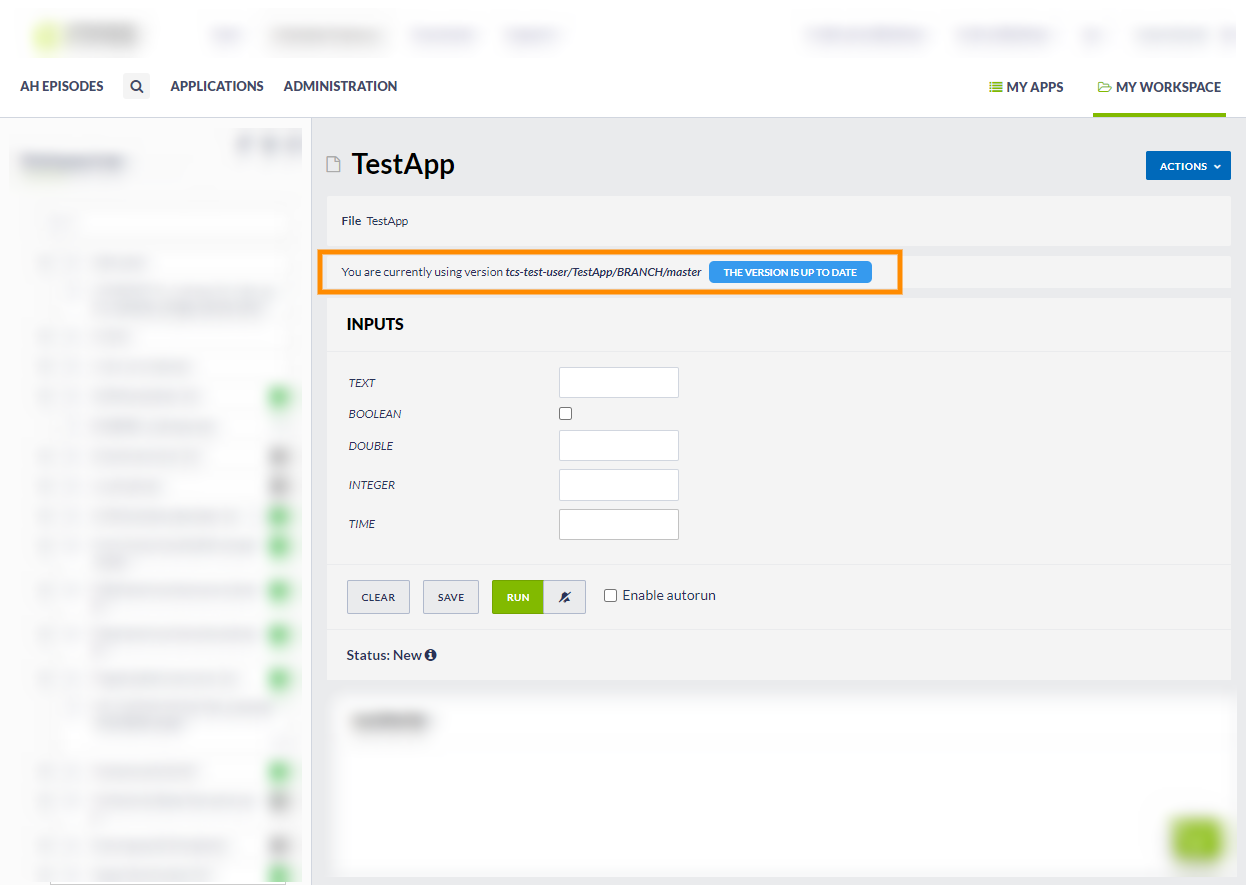
Figure 2. View of the custom application added to workspace, the version in workspace is up to date with the changes in Application Workbench
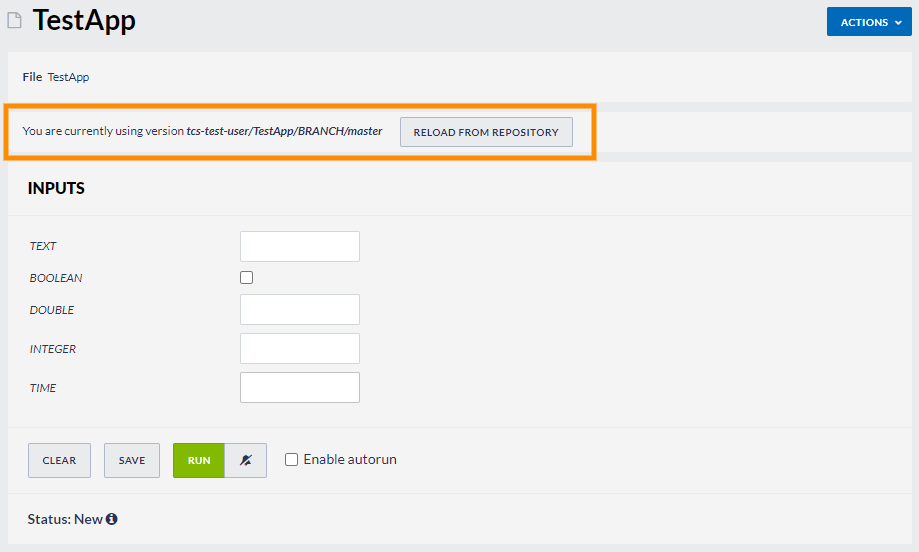
Figure 3. View of the custom application added to workspace, the version in workspace is out of sync with the changes in Application Workbench
When working with custom applications, you can also create your own versions of the application (e.g. for testing different settings of inputs/output or different implementations of the same algorithm) by creating different branches or tags within the application's repository - to learn how to do this please check this guide. The applications listed under the applications list (Figure 1) are always displayed from the main version (usually branch master), and this version is always added to the workspace. However, as soon as the application is added to workspace, you have the opportunity to change its version. This might be realized by using the Change version button (marked with (2) in Figure 4) and, then choosing the version from the drop-down menu and hitting Apply (marked with (3) in Figure 4). Note, that this option is only available if there is more than one version of the application to choose from (compare with Figure 2, where this option is not present).
The label You are currently using version always shows the version that is displayed at the current moment in the workspace. The version name is constructed of four parts: (1) name of the Application Workbench user - in most cases this will be your user name (created according to this guide), however, if the application was shared with you by another user, this will be their user name; (2) name of the application (it's repository in Application Workbench) - set at the stage of Creating new application; (3) information whether the version was created as a branch or tag (see also this guide) - BRANCH for branches and TAG for tags; (4) name of the tag or branch. E.g. in tcs-test-user/TestApp/BRANCH/master (marked with (1) in Figure 4), the tcs-test-user is the test user name, TestApp is the name of the application, BRANCH is signifying for a branch, master is saying that we use the main branch (master) of the repository; in the version displayed on the drop-down menu (marked with (3) in Figure 4), the name of the version is tcs-test-user/TestApp/BRANCH/version-with-simplified-app-def, which points to a branch of the same application, but the branch name is version-with-simplified-app-def. Note, that it is important to name the branches and tags with relevant names when creating new versions, as, in this way, they are more easy to identify at this stage.


Figure 4. View of the version changing controls of the application added to workspace.
Before changing the version (after the Apply button is clicked), we will ask you for a confirmation of this operation (Figure 5), as changing the version might mean that some values you already input to the application may be removed in case of changes to the application inputs files and/or parameters - this change should not be made accidentally.
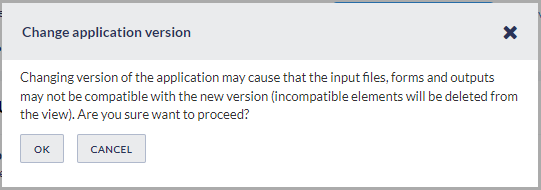
Figure 5. Confirmation dialog for the application version change operation
Running the application
Running a custom application is no different from running a built-in application except for the computing resources used for the actual computation. In case of the built-in applications, we usually use the resources directly connected to the EPISODES Platform and only in unusual cases or with more load of the system, we delegate the computation to more external resources - computing clusters. In case of custom applications, we always delegate the computation to these resources, as it allows for more secure (sandbox) environment. When running a user-defined application, the EPISODES Platform cannot control the content of the application, therefore, running it in a sandbox allows for protecting it, and its resources from, possibly, dangerous operations and ensures the resource consumption will not exceed the declared amount.
The only consequence of this setup will be that, when running the application, you will first see the Submitting status (see description of possible application statuses), which will mean that the application waits for assigning computational resources. This should take up to couple of minutes (unless you declared that the application will be consuming more resources - this might cause longer waiting time - see also requiedComputatationResources option in the Application Definition guide), then the status should change to Queued, which means that the resources were assigned, and the computation will proceed as with built-in applications.
Since the custom applications behave exactly in the same way as the built-in applications, you can use them in the same way as the latter, which includes, e.g., requesting notification about the application results or using them inside a workflow (here the custom applications can be mixed with built-in applications).
