Page History
There are several actions that User may perform into his/hers personal workspace. This chapter presents only the available choices, the detailed description of the actions is presented in the corresponding chapters of the "IS-EPOS User Guide".
The upper part of the workspace screen is the same with all the other pages in IS-EPOS web platform (Fields 1, 2 and 3, Figure 1). Portal's pages ('Document Repository', 'AH Episodes', etc.) are shown in Field 1 of Figure 1, whereas field 2 depicts the Profile and affiliation affiliations, together with the logout button. The workspace can be accessed from any page, by clicking on the "'My workspace" ' tab (right side of Field 3, Figure 1). The same field indicates also the current working directory, giving possibility to change it by clicking at any other directory available (indicated by 'D' letter, Field 4, Figure 1). Field 4 includes applications and data that have been already uploaded to the workspace by the User (see "AH Episodes", "Applications" and "Data Dandling Applications" chapters). The Actions that User may perform can be accessed either by choosing the "'Actions" ' button (field 5, Figure 1), or by clicking on the 3 dots on the right margin of Field 4 (indicated by the purple box), just next to each directory, application or data set. The available actions differ from item to item and are summarized below with a brief description:

Figure 1.
- Actions for Folders-Applications:
- Make directory - The User can create a new directory.
- Show File Information - File information (type of object, Format, Source, Size) etc. are displayed on the screen.
- Delete - The User may delete the item. Confirmation is requested before permanent deletion.
- Rename - The User may specify a new file name.
- Copy - The item can be moved to a different location/directory of the workspace (and keep existing in the current location).
- Upload - Files can be uploaded to the workspace by this option.
- Create file - The User may create a file by specifying File name, Data type and File format as requested by the system.
...
Choose Episode and seismic Catalog on the IS-EPOS platform (Fig.Figure 2):
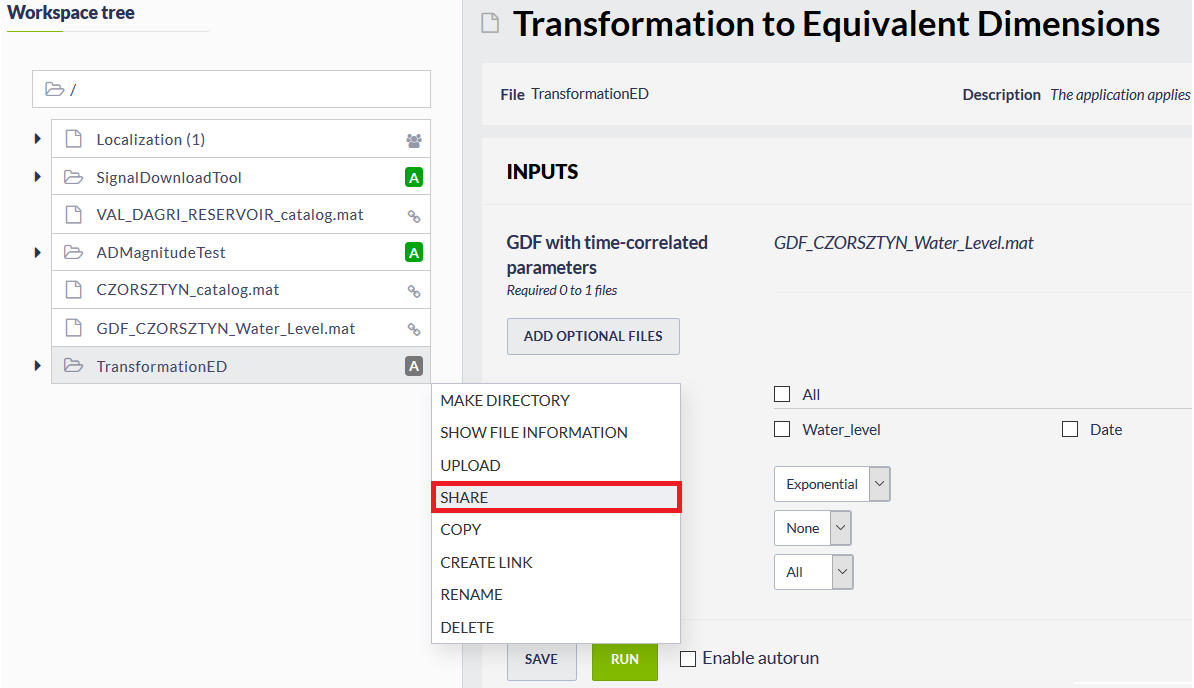
Fig. Figure 2 IS-EPOS platform window after selecting Catalog.
Then, select “Action” 'Action' button and “ADD 'ADD TO WORKSPACE AS LINK IN LOCATION”LOCATION'.
Fig.Figure 3 Options available through “ACTIONS” 'ACTIONS' menu located next to Catalog name.
In the next step User is allowed to choose a destination where link to the catalog will be created.

Fig.Figure 4 Window with selection of destination directory within User’s Workspace.
After accepting the selection, the link will be created in appropriate directory. User is now able to conduct scientific research on a file linked to the his personal Workspace, which can be opened by selecting the button: “My Workspace”'My Workspace', situated in upper right corner of the IS-EPOS platform.
...
Example: Uploading user’s catalog to the IS-EPOS platform
Firstly, click the “My Workspace” 'My Workspace' button. Then, select desired directory within the workspace and pick the Options menu (3 squares next to name of the directory) (Fig.Figure 5).
Fig.Figure 5 My workspace with 'Upload' option.
After choosing the 'Upload' option, new window appears (Fig.Figure 6):

Fig.Figure 6 Upload file parameters
User must choose the file he wants to upload, select proper data type and file format. Afterwards, User should select “OK” 'OK' button.
Uploaded file appears in selected directory in User’s Workspace.
...
Overview
Content Tools